
Charlie has helped with our parrel beads and now the dead eyes. Next project will be belaying pins. He has an awesome wood lathe perfect for the job.

The dead eyes are for the standing rigging. We will have 10 sets for our rig; 3 for the main and 2 for the mizzen. Dead eyes are traditional and today most boats use turnbuckles to tension their rig.
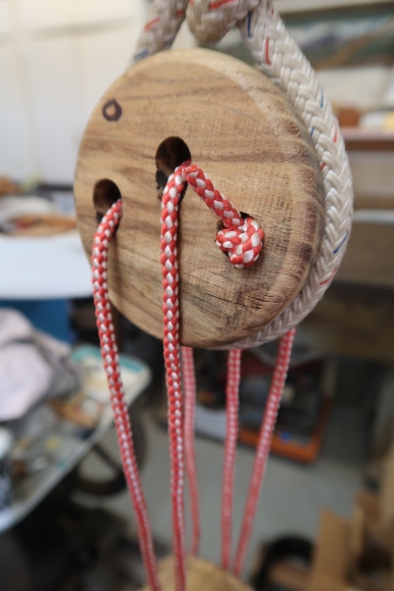
The top eye will have a rounded groove around the outside to receive the wire stay and the lower eye will have a 90 degree flat groove for the bracket that attaches it to the chainplates. A line is looped through the holes, called a lanyard, and knotted at the start then tensioned at the other end either fastened up to the stay or back on itself once the rig is tightened. To the right is just a demonstration. Our dead eyes will be about 3 3/4” round with 1/2” holes. Three strand line is what we’ll use for the line to stay traditional. Most likely our stays are looking like we’ll make out of 3/8in galvy wire.


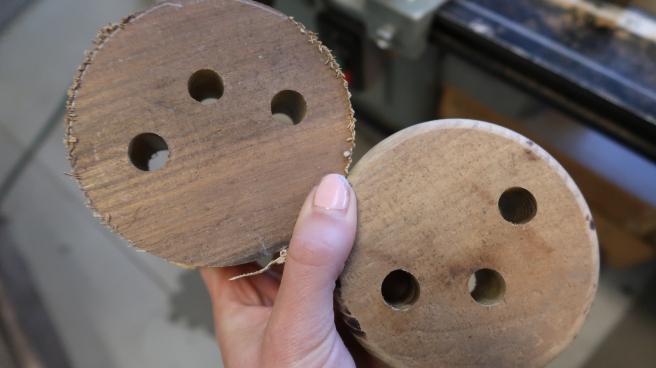
First step was getting ruff blocks out of our 2×6 stock of black locust then using the template Charlie made in accordance with the grain pattern we want we marked the top and hammered a pin in the three places we wanted the holes.


Charlie also made a template for his lathe to cut the dead eyes round. Securing two bolts, locked the dead eye to the lathe and after a few passes we got down to the width we wanted.


Charlie taught me how to mark the ruff blocks so he could start drilling the holes while Garrett finished cutting the blocks.


We danced around Charlie’s shop in unison. Garrett took over drilling holes and Charlie switched to the bandsaw to get our ruff circular shape before moving onto the lathe.


Are you starting to see it?


Then to the coolest machine. The lathe. Rounding the dead eyes took a couple passes.


It was a great day! Charlie is a monster of efficiency. Garrett continued cutting the ruff shape with the bandsaw then passing them onto Charlie.


It wasn’t before long that we had a whole tray of deadeyes. We didn’t totally finish the job this day but we got pretty far!


The final step we got to that day was as Charlie finished rounding on the lathe he passed them back to Garrett to take them to the router to smooth the edges.
Here’s the before edge rounding and after:
Next time we’ll cut the grooves on the top and bottom eyes and also add the soft groove where the lanyard passes through the holes of the dead eye. Garrett wanted to do a little more research for the appropriate size bracket for our bottom eye where it’d attach to the chainplate before we cut the groove. It was really nice doing a project for the boat but away from the boat. We’ve still been having off and on rainy days so this helped keep the sanity cup full 😉

All 10 sets are rounded into shape with 5 extra eyes to spare in case we break any down the line. One step closer to raising the masts therefore closer to sailing!!!!
Thank you Charlie!


Nice will organized workshop..End result is just a reflection of that..Keep up the good work..
LikeLike
Hey R&G –
Do you still need the gas tank? I don’t see it on the current wish list. If you do, please send the spec. I get free shipping from Amazon and Jamestown, and Defender is always cheapest. So I will shop around.
I think Patreon gives you my email, so let’s figure this out one to one.
Paul K
LikeLike
Interesting and informative! Thanks for sharing! Disappointed you didn’t post the rest of the process though. Is there another blog that covers the rest of the process or somewhere I could see pics of the finished product? I might need to make some of these myself.
LikeLiked by 1 person
I was fortunate enough to dive-up a deadeye from a British ship lost at Jamestown, VA just near Cornwallis Cave years and years ago.
LikeLike