

Yesterday was very exciting. Actually working on phase 2. I’ve sort of got it in my head that we have 3 things to do: Painting (which includes the caulking), Prop Shaft (basically plugging up the shaft log aka big hole in the back of the boat), and Rudder (its made but not finished and we have to hang it on the boat.) So Phase 1 is almost complete:


Garrett completed 3 coats of primer on the starboard side Wednesday meaning one side is totally ready for finish paint. The port side and transom still need to be sanded/preserved and then also need 3 coats of primer. That third coat really evened out the hull and eventually that green preservative stopped peaking through. Although a few people think we should paint the topsides minty green…


Phase 2 began with hunting down a prop shaft, cutlass bearing, and stuffing box. We were hoping to find all three of these used. The Napa Boatyard, Kirby, came through for us. They have so many treasures littering their yard he was happy to unload a few things. Kirby sold us the whole set up for $80. We had to buy a new bearing (that goes in the cutlass bearing stern housing, might be a different term for the outer piece but I don’t know it) which was a little pricy at $100 and we’ll have to buy new packing still for the stuffing box which doesn’t cost much. The real work for this phase broke ground yesterday:


Garrett drilled a pilot hole and then with a double nut set up was able to screw in the big bronze bolts that will hold the housing in place.


Garrett passed through a stick with a string attached so we can line up the stuffing box on the inside. The stern housing fit perfectly snug on the outside of the shaft log but the inside end of the shaft log was a little larger so the stuffing box didn’t sit quite so organically.
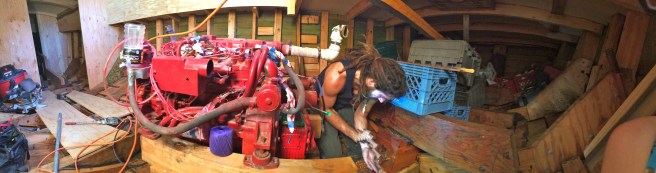
It went really smooth. The only hiccup was when one of the drill bits for the pilot hole broke off, in the hole! Garrett was so pissed. It took forever to get that dang thing out and we were frustrated that we might have to cut a bigger hole to remove the metal. Garrett persisted and eventually twisted the busted piece free and we were still able to use the hole for the stuffing box bolts.


We got 4 bronze bolts shipped to us from Jamestown Distributors. Garrett wasn’t too stoked with the quality as the threads are a bit ruff but they’ll do the job fine. They were just over $15 each and we got the nuts and washers from the marina store. The 4 nuts were $3.24, the washers were $2.64, and the lock washers were 80 cents apiece. The whole set up including the shaft and two housings and new bearings is going to put us right around $300 so not too bad all in all.


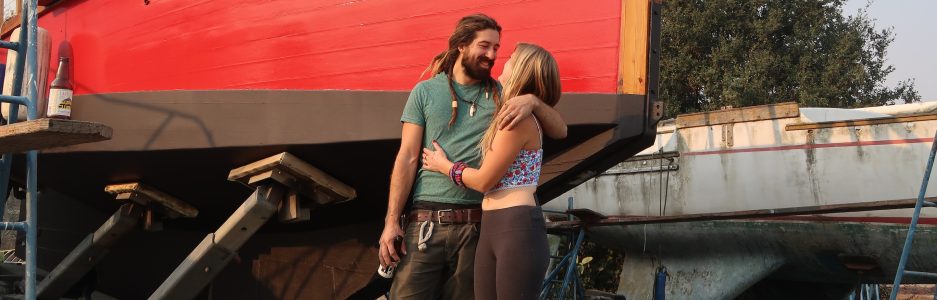
Yesterday was my first day back to the boat since the hospital. I was mainly filming while Garrett did all the real work. “Taking it easy” I think is what they call it. Easier said than done but it was very apparent that I couldn’t do much more. Going up and down the ladder would wind me. I’ve never had limitations like this. Garrett’s usually the one hurting himself. I’m listening to my body and drinking as much water as it can take. Today we’ve decided to go sailing on the bay with our good friends, Jon and Carly, removing the temptation to over exert myself in the yard 😉
But…
Everything is dry fit into place and waiting to be bedded and lock washer tightened down!


Awesome Job. Great Post. I would safety wire the nuts to the shaft housing at the hull. The unknown vibrations could vibrate them loose. (just like the prop nut.).
Man, I love this phase of your project, AWESOME JOB!!!!!
LikeLike
Although its a little late, you can still do it. Rout out a nest in the timber for the cutlass housing flange to keep it from working. If the housing moves at all it will progressively work itself loose.
LikeLike
Well done you will be on the water in no time ,,, watching you two makes me wish I was years younger to be able to do the same ,,, Have enjoy your whole process and looking forward to your launch ,,,,,
Brian
________________________________
LikeLike
First off great to hear you’re out of the hospital and starting to find your sea legs. It’s always a highlight of a long week to get an update on you guys in the boat. Best of luck and here’s to Fairwinds and good Seas.
LikeLike
😉 Thanks Dave!
LikeLike
Are you planning to shape the rear of the keel where it leads to the prop of just leave it as is?
LikeLike
I think we’ll be leaving it as is. The only thing that we’ll shape on the keel is the stem(bow), purely for esthetics though. Although… we’ve been known to change our minds haha
LikeLike
Recommend using and additional nut on each bolt as a lock-nut, torque them to each other, or wiring the nuts. Lock washers may not be sufficient. Serious amounts of vibration at the prop. Also, recommend shaping the keel to conduct water flow to the propeller. Important that this is done to ensure the prop is efficiently moving water – propellers operate best in laminar flow, swirls behind the flat face of the keel cost you thrust, and will induce additional vibration.
LikeLike
Hi I agree with the other comments, you have plenty of deadwood material to scoop out above and below the shaft to get better water flow to the Prop if you do it now you won’t have to worry about weather you should have or not. …should only take a day or so with a grinder……one more day…. Cheers Warren
LikeLike
Found your site a few days ago and have binge watched the entire adventure up to this point. Wow! What an amazing couple you two are. You should be very proud of yourselves. I grew up in Napa and learned to sail in Lake Merritt in Oakland. I’ve sailed past the Napa boatyard back when it looked much worse for wear that it does now. I’m glad your health is improving and your project is progressing. Looking forward to future updates.
LikeLike
I’ve been watching since the keel was started, makes me smile to see how far this project has come, keep up the good work, we are still buried under 3 feet of snow in northern Alberta, wish I was in California
Cheers
LikeLike
I found you guys a week ago and have watched all of your videos. Love what you are doing. I actually have “some” woodworking experience. I owned a cabinet shop for 20 odd years and designed and built high end furniture and interiors. If you ever need advice on wood (please note, I have never worked on a boat larger than a canoe) please feel free to ask.
LikeLike
That’s awesome Janet! Thank you
LikeLike