
The yard is keeping us pretty busy so I apologize I haven’t written more. The deck planking is looking really good and I’ll upload some current photos here soon! This episode is the beginning of the deck planking. Starting with the covering boards, trim, and king planks. Garrett’s right this is making Rediviva look super shippy!
Episode 57 is out!
Episode 56!
Episode 55 – Sampson Post and Battery Bank
Finishing Our Main Mast – Ep54
Episode 53 – Building Our Main Mast
Episode 52 – From Bulwarks to Mast
Episode 51 – From Plank to Soup
Week Two Building The Main


This is a picture filled post! Building the mast was such a fun project. Garrett really got into it. Every stage had huge visual satisfaction!


Now that the mast is glued up and planed smooth Garrett could mark his lines to eight-side the mast. The first step to getting the main round. Garrett figured out his measurements on the corners to make the mast close to an even circle but since the lumber isn’t perfectly uniform the mast will be slightly oval.

Garrett drilled a hole in his square so he could put the point of the pencil to the correct mark and just drag the square down the length of the mast. Since the square has a lip he could put it on the edge of the lamination and have a consistent line. He checked by eye each line then we flipped the mast over until he had all four lines marked. Then came the skill saw. The new dwalt is awesome! and has an easy lock to 45 degrees. Simple.


I can’t wait to make the episode about this. The whole process was really cool. Let the sawdust fly!


Garrett put a lot of thought into the orientation of each board in the laminate. Taking into consideration we were cutting away the corners so that any board with major imperfections would be placed where those defects would be removed during the process without any extra steps. A few flaws were unavoidable but they don’t diminish the strength of the mast.


Once all four cuts were made we had an octagon spar.

Oh boy, we will call that a day!

We had just beautiful weather the entire duration of this project. Every morning blue and warm. This stands out to me now as I write listening to the rain falling outside.

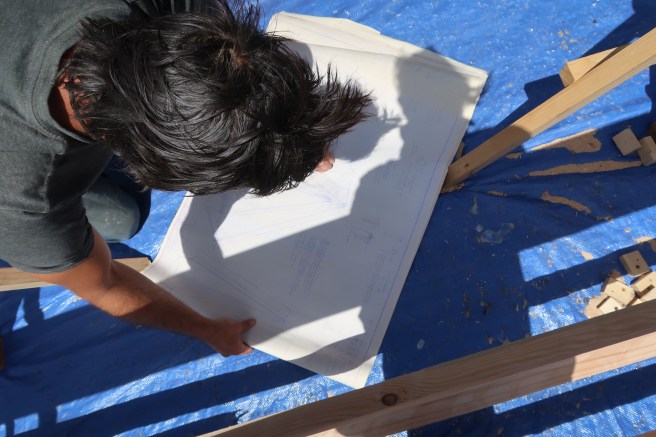
Before we plane and sand the whole thing round Garrett broke out the plans to figure out the placement of the hounds. The hounds are what our rigging wraps around to help secure the mast upright.


He figured out the location then grabbed some locust to do the job.


This was another fun part of the mast project. He got to use his new chisels and new compact router as well as the lignum vitae mallet passed down to him from an old neighbor in the yard. All of you following and the kind donors have significantly improved our quality of life and labor! We can’t thank you enough.


This wrapped up another day. The following day was a long day of planing, sanding, and sighting.


Plane one corner than festool sander. Next side. Plane, sand. Roll mast. Plane, sand. Look. Plane a little more, sand smoothish. Look. Next corner. Repeat. Hydrate. Repeat.

Starting to see it now!


We tag teamed with the finish and orbital sanders and presto!
Roundish.


Before we can layer on the soup Garrett shaped the mast head. Using his compact router again and his, also new, hand plane. Then the usual suspects; the sanders.


After this, one…more…thing.
Mounting the hounds:


The tube of sika flex got a little clog then exploded. Good thing it’s long open time. There will be through-bolts also, we just haven’t run to the hardware store yet, but we had left over fasteners from our topside planking to use.

Drum roll please. Introducing my favorite part. SOUP.
Soup = pine tar+linseed oil+varnish+japan dryer
We keep adding to this gallon so there’s probably a few other ingredients floating around in there. Every sailor has their own brew that is ever developing like a good Mexican mole.


There it is.
A couple more coats then we’ll move it to storage in the yard awaiting for the month we’re ready to motor Rediviva back to the launch ramp to freshen her bottom paint and step the masts!
May has brought some more rain which will hopefully force us to get back to the engine, which we’ve been putting off because it’s so much nicer to be outside. We got back to town two days ago from my brother’s graduation from Boise State! Another trip is on the books to visit friends in Oregon and maybe a drive out to the property in Washington where Rediviva had her start! Busy spring but productive and full 🙂
~Ruthie
