
Episode 42!
To support the making of these videos: Patreon and to support building Rediviva: Bonfire


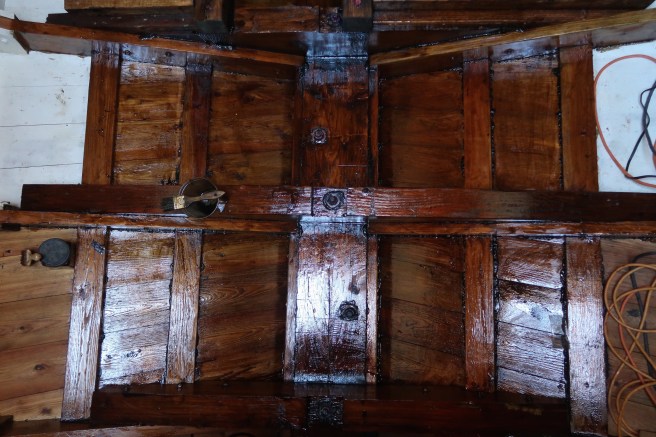
We might not like the rain but the masts LOVE it!
We’ve been trapped inside as the rain continues. I, too, love the rain as a sit with coffee in the morning but then the day has to start and the rain could stop then 😉
We know very well you can’t control the weather so on the bright side the masts are closing up nicely. The hot Napa summer took a beating on our poor main and mizzen. Mostly our fault…as we didn’t oil them as often as we should. Something may have to be done but it’s impressive how the wood is continuing to swell and those checks look a little less scary. A problem for another day.
Today:
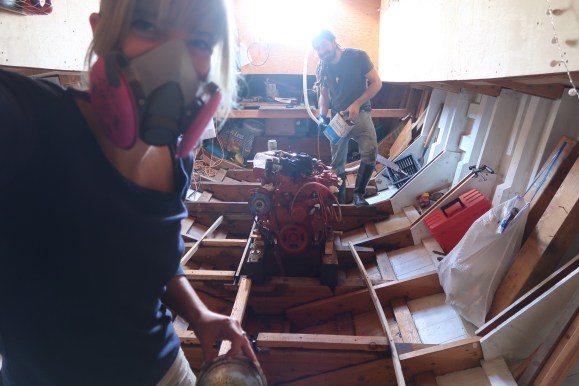
 Now that the driveline is in (while we wait until we can afford the thrust bearing and various other hoses and parts to finish the engine) Garrett’s back to working on the interior. First, he boxed in the engine then installed the half bulkhead to enclose the head.
The engine box is incorporated into the interior and is apart of the dinette seating. The box will be entirely removable for optimal engine access. For little stuff, there will be hatches all around. To remove the whole thing Garrett’s going to install a hoist system so it can go straight up from the deck beams and if need be he and I can move it from there and place it anywhere, it’ll even fit out the companion way. Next to the engine box will be the other side of the aft dinette seat with a half bulkhead there too.


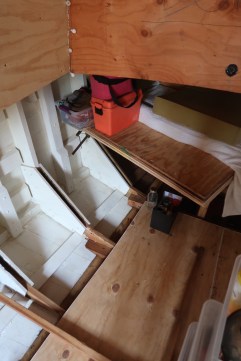
Both faces of the box will have access hatches and the sides for the small maintenance things. Eventually, the whole interior will have access points. Just like the forward dinette seat:


These are easy to construct and Garrett’s mainly ruffing in the interior to get the feel of the flow through the cabin. Later, he can go around and add hatches to everything but right now he’s just focusing on the big stuff. Like bulkheads:


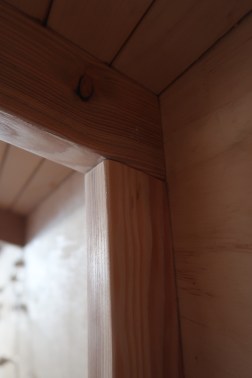
The other side of the head (toilet) is now done. This is probably as far as he’ll go with the head area for now. Once everything is ruffed in then he can go around and do the finishing touches in each area. It will look amazing when all the plywood is paneled with beautiful timber. Right now it just looks like a construction zone.

To move forward and work on the main bunk we had to rearrange some things. Our bed has been atop our plywood storage. In order to not accidentally close in the plywood up forward we had to move it to under the aft deck. We did this before installing the head’s half bulkhead or we wouldn’t have had enough space to do it! We’d been storing a bit of our stuff under the forward bunk which also had to find a new home under the aft deck. It’s a tight space….

…Once you get a lot of crap back there that is! 4 full sheets of plywood, some scraps, our two bunk pads, tools, and household items.


Garrett’s always thankful when I’m around to crawl into the small spaces. I think he also gets secret entertainment every time I hit me head.


This was the temporary bunk.
The final bunk will go from the frames at station 4 and back up to the half bulkhead where the head will be. The foot of the bed will have cubbies for clothes. This space will have to make room for the main mast.

The “funk” as we’ve been calling it (forward-bunk) will be a little lower than the temporary one so we can sit fully up in bed. Again, there will be big hatches for storage and access to the bilge before it’s “complete.” We’ve been staying off the boat since the end of November but once the bunk is done we can start on the galley then think about moving back on board 🙂
Also! We’ve added new colors on Bonfire:

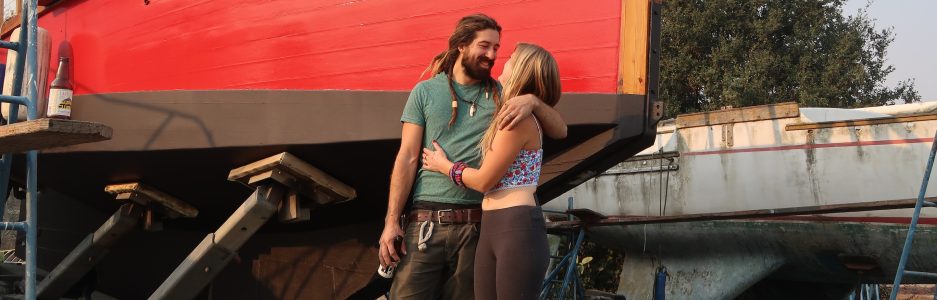
Red had to be one of them so that we can all look as good as Rediviva!
The shirts (sweatshirts and tanks too) play a big roll in funding projects on board. The next item we are saving for is the thrust bearing which is about $200. 50% of the shirt sales come back to us! Thanks for reading and all that you do to encourage this build. I love reading all of your comments and a heads up: next video will be coming out on Thursday!!! See you then 🙂


Garrett picked up the driveline just before the new year and was able to install it before we left for a family trip. It is beefy!


Under the floor boards it rests. We had to make an extension piece from the engine so the driveline cleared one of the floors and the middle floor had to be trimmed out a bit.


Garrett had to order the coupling that attaches to the engine separately and the 6 inch shaft that then goes into the driveline. The company that made this custom for us was really awesome and used some recycled end yokes to help keep our cost down.


Above are some photos of the universal joints.


The zinc is only there to stop the prop shaft from exiting the boat. Garrett placed it there before we moved Rediviva to her current dock. We still need a thrust bearing which will do the job of holding the shaft in place and absorb the thrust when the engine is running and in gear.

We’ve had none stop rain since getting back from our family christmas trip but today the sun is shining down on Rediviva’s deck. Garrett’s been doing some work on the companion way hatch in the garage so the tarps close up the boat making it more cave and dungeon like. I think some companion way doors are also in order…maybe some ports too?!?! It’s on the list 😉
Thanks to our Patrons! They are the reason it’s possible for me to make this my full time job and guarantee you’ll see a new episode every two weeks. A new year’s resolution if you will. Soon, we hope to be able to give Patrons early access to episodes and every other week there isn’t a new episode a real-time update. Salt & Tar is growing this year as Rediviva is coming into her own and we can make both a priority! Thank you for your support and helping us grow 🙂
~Ruthie
p.s. If you are interested in becoming a Patron (click here) every $1 helps. You can pledge a dollar or up to infinity and the amount will be withdrawn only when I release a video. This is how I earn a paycheck. I work for you, ourselves, and most demandingly the boat 😉
Waiting on the driveline to be complete is proving difficult… Garrett can’t move on the rest of the interior until he has the engine fully hooked up to the driveline because there’s the possibility of needing to raise the floor. But by how much?
..so we wait..


Can’t complain really because obviously we’ve been making good progress. I can always tell when Garrett’s been on a roll with projects because the boat desperately needs some tidying 😉


A few finishing touches on mounting the engine rounded out the week. The 3/4in rubber arrived in the mail. Replacing the plywood risers the rubber fits between the engine beds and the new mounts. It’s crazy thick stuff. Garrett tried to rip it with the jig saw but that just started to tear it up. A little team work usually solves the problem.


The rubber will help absorb some of the shake and noise from the engine. Now all the bolts and lags are in, the engine is secure!
Garrett’s pretty ready to switch to some deck work, feeling a little trapped inside, but it would mean totally changing gears and he’s set up for interior projects right now. It’s hard but the best decision is probably to wait. Easier said then done for this captain.


A final rattle test:
ok! Ready for the rest. The driveline company said “end of week” so maybe tomorrow will be the day!?!?


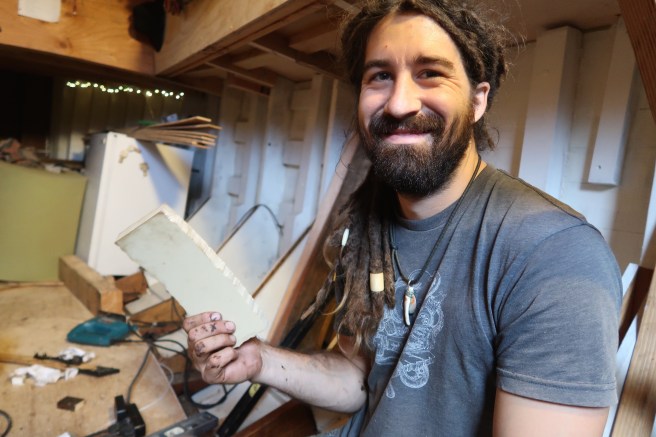
We’ve had bulkheads in the boat before but this feels real. Garrett constructed the template and we finally got to pull out one of the sheets of ply we’ve been sleeping on to cut out our first bulkhead. 5 sheets of plywood have been resting inside the boat under our sleeping pad in the v-berth since the final cabin walls went up. Garrett thought it would be useful to have several full sheets inside the boat for when the time came to build the interior.
A bit cumbersome…
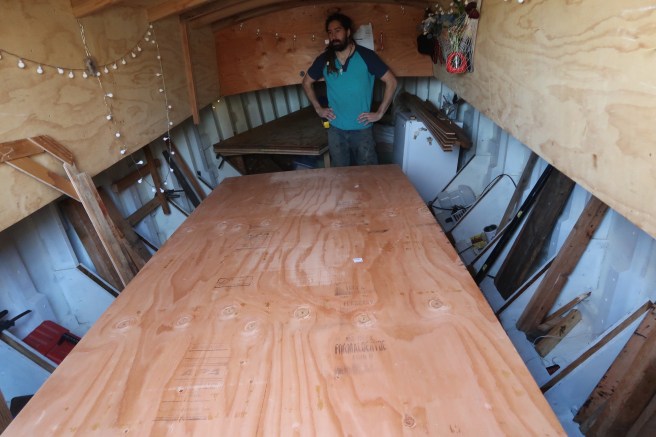
Our cabin is about 6.5 feet wide and almost 16 feet long so the 4×8 sheet of plywood took up more than half our working space but this allowed Garrett to make the bulkhead in nearly one whole piece. If he’d cut from a sheet outside the boat there’d be no way to get it through the companion way. The head bulkhead comes out from the cabin wall 3 feet and with our 2 foot side decks Garrett needed to make a foot wide spacer piece. It’s much nicer to have a seam under the side decks than straight down the middle where the bulkhead would be no longer a decent structural member of the interior.


Now to visualize.


And make a bulkhead appear.

The spacer piece will be behind cabinetry and the whole bulkhead will later be paneled in beautiful western red cedar.

After the bulkhead was secure Garrett moved onto the forward settee of the dinette.


He dismantled the template for the bulkhead and reused the pieces to construct the face of the settee. This will be the forward seat of the dinette which is a lot like a picnic table. It will seat 4 comfortably but I’m sure there will be nights where we squeeze more.


We have more plywood up in the garage so this is when Garrett carries the templates for the smaller jobs from the boat up to the house.

Getting our head right and setting up proper work space is key. Thanks to our host we have and awesome area out of the weather to work. I’m so grateful to have my space inside where I can edit videos especially while most of the interior work is single handed. It’s so nice to still be close by if Garrett does need a hand or if I need a break I can always go film or oil something.


Home Depot is a 5 minute drive away as well as the grocery store. Our favorite burrito spot is a 5 minute walk around the corner and on long work days when we don’t feel like cooking dinner there’s a Chinese restaurant that makes incredible hot and sour soup too. It’s important to remind ourselves how fortunate we are. I feel extremely blessed to be where we are. The drive to get sailing is still as intense as ever because we are NOT land people. It’s great to have the supplies and amenities of society but Garrett can’t wait to catch our dinner! To be free and self-sufficient isn’t the easiest because you have to be capable of handling obstacles, sometimes with little to work with, find happiness in small things, and work with your partner. I feel lucky here too. We’ve never had a whole lot and our tools definitely could manage an upgrade but I find myself happy even with the little things. Garrett works so very hard and is extremely inventive in problem solving. Even in our heavy weather sailing history we’ve never argued. We know our roles and we respect each other. Building this boat has at times felt like one big squall after the next but I try to find the best in everyday.


The day concluded with the rest of the framework for the settee and the inner floor complete with a hatch to the bilge.

There will be a raised floor between the two seats of the dinett
Garrett was a little perturbed at how long it took him to complete a relatively simple days work. It is hard because the mind is so very active it’s exhausting while the body is just plain exhausted. These last years of building Rediviva into the boat she floats as today has taken a lot. Much more than time or money but energy. Garrett’s often joked that he was 23 when he started and now is 53. Funny how four years can feel like thirty. BUT cruising/sailing has a way of turning back the clock so we’ve got that to look forward to. It’ll all even out. Right?

I drew up the interior as it stands currently. I messed up on the angle of the cabin walls, it’s actually the opposite and angled in at the bow. Our side decks are also bigger than the representation drawn, they are 24 inches, but this will give you an idea of the layout. So Garrett’s completed the forward full bulkhead that is the wall separating the head and the dinette. The first half (the forward seat) of the dinette is mostly finished. Today, Garrett’s big hurdle is constructing the engine box. It has to be completely removable and half of it is apart of the aft seat of the dinette and the other half has to be a high enough of a counter for the exhaust elbow to fit underneath.
I wish I could send elves or gnomes in the middle of the night at take away all the rest of the work left. The only way out of it is to go through it, I guess. So much is done! She’s in the water! This is of little solace for my partner when his post-launch list is bigger than the pre-launch list; and it grows daily. We press on. The next video will be out on Tuesday and tomorrow the sun will come out, this I know 🙂
~Ruthie
4 weeks and 2 days soaked and Rediviva has swelled tight. Really at 3 weeks she was pretty dry but we are comfortable now moving onto interior preparations.


For the millionth time this means sorting through and organizing our lumber. We ditched our lumber in multiple places before launching the boat because we just needed it out of our space in the boatyard SO now we had to wrangle it all together to assess what we have. My awesome parents let us make a lumber yard out of the side yard at their house. Garrett cut sticks so we can properly store the wood through the rainy season. We got our workout for sure. One solid day, moving wood into the truck out of the truck, from the bottom of my parents property to the top, and from inside the boat up to the garage. A summary of what we have: Oak, Locust, Fir, Cedar – Red, Spanish and Port Orford, Redwood, Wenge, Blood, Zebra, and more Douglas Fir.


Now that we’ve got that sorted out next was framing for the cabin sole. In about 2 days Garrett got the ruff sole finished. We’ll be planking the floor and adding the floor boards after we’ve settled on the rest of the interior layout.


“Building the interior is so much harder than building the boat…”Garrett confessed. “I’m not an interior designer. We can’t simply just use the interior drawings from the plans because the one thing about the plans we didn’t like was the very narrow side decks. Now that we have 24 inch side decks the interior Buehler had planned will no longer work…so we have to design it ourselves. There’s so many different possibilities and building the boat I had a do-this, do-that, to this measurement instructions but the interior is a blank canvas. It is NOT something I want to do a second time…or third..so the pressure to think about everything is exhausting.”


It’s been about 2 weeks of discussion; or more like staring at our “blank canvas.” In my opinion what got us out of that stalemate was going over to Peggy G (Tiffany and Tyler’s boat, our old boatyard neighbors) and taking some real-boat measurements. Garrett dictated to me the dimensions and I made notes then drew up the interior, upper picture to right. Peggy G is an Aries 32, a round bilge double ender, making her smaller than Rediviva but since we are hard chined our interior space is comparable. It was extremely helpful to see the minimum space needed for things like walk ways, tables, and seating. Peggy G’s walkway at midship is right around 16 inches and her salon seating is at 18 inches with a table only 16 inches wide, and the settee is 21 inches perfect for lounging. These measurements are much smaller than we thought we could get away with. From cabin wall to cabin wall Peggy G is 6 feet where as Rediviva is 6.5 giving us a little more room to work with. So our head will be bigger at 3 feet deep and 2’6” wide:
Our head (toilet) will be on port (left side of the boat) with a full size bulkhead (wall) separating it from the rest of the cabin and a half bulkhead just inset front of the forward cabin face to divide it from the v-berth (main bed in the bow of the boat.) This full bulkhead is the first part of the interior, besides the cabin sole (floor,) that is one step closer to making a final decision on the interior layout. Like Garrett said earlier this is not something we want to do over and over again, especially when we start to plank and use finish lumber like Redwood, Wenge, and Blood Wood.
We laid out our idea of the flow of the interior with sticks. A lot is still up in the air as we’ll continue to figure it out as we go but as the pictures scroll above:
Picture #1: Coming down the companionway, a good 2.5ft or so between the two-quarter berths and an 18-inch walkway between galley to starboard and engine box on port
Picture #2: Long counter galley (kitchen) on starboard (right side of the boat) equipped with 3-burner stove/oven (we already have) a fridge/freezer (don’t have) and sink (do have but might change)
Picture #3: Dinette seating with table. We were hoping for a U-shape or L salon but this is what’s most practical for Rediviva.
Picture #4: Port Quarter Berth. Extending under the aft cabin face it’ll be 7 feet or so long and wide enough for two. This will be for additional crew or visitors but also our under-way crash pad and where I can see us watching movies and having morning coffee.
Picture #5: Starboard Quarter Berth. Will be a single bunk, mostly under the aft deck so it may be storage when there’s no additional crew.
Picture #6: Looking aft. Companionway ladder will come straight down between the two-crew/passage bunks. The engine box may have the sink to allow more counter space for the galley. Box will be completely removable for engine maintenance. Partially, the last seat of the dinette will also be apart of the engine box.


Holes. Holes in the cabin ceiling. “It’s so hard to drill holes into the boat when you know she’s completely water tight and doesn’t leak any where!” Garrett said just before he lifted the drill overhead. I was happy to hear his reservations as there was a time I could’ve sworn he loved putting holes and tearing things off the boat… 🙂


Garrett added another beam to the ceiling to support the full bulkhead for the head. The rest of the frame work comes down the cabin wall then he’ll construct some cross planks over the ribs (frames) to secure a vertical support for the bulkhead to screw into and finally along the cabin sole there will be another board for the bulkhead to secure at the base.
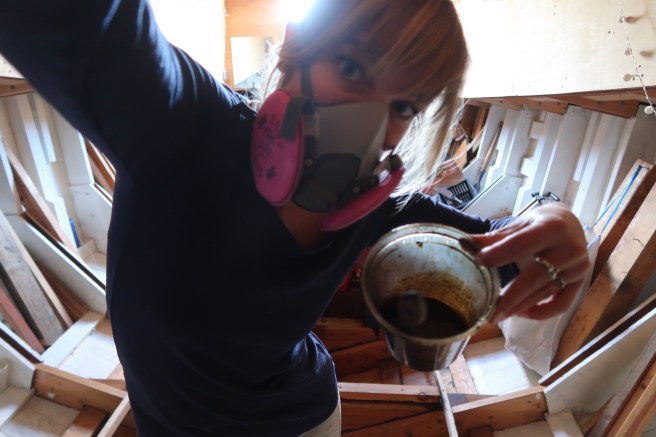
We paused in the middle of framing the head because before we install the permanent wall Garrett had a good idea: soup the bilge. I know I’ve written about boat soup before but for those of you who don’t know boat soup is a sailor’s slop designed to keep their wood thriving. Each salt has their own brew. Garrett’s mix for this purpose is mostly Stockholm tar with linseed oil, to keep the wood saturated and protected.


This halted our progress for the rest of yesterday as it’s quite potent. I remember our second wooden boat, Bravata, how her bilge sparkled after her first souping in years. I felt this same pride now.


4 weeks old as a floating boat and she is taking her first steps towards total completion. We are still waiting for all engine assembly parts to arrive but sinking our teeth into the interior is such a joy. The masts and deck hardware come next. Before long we’ll be waving at you from the bay under full sail!
~Ruthie

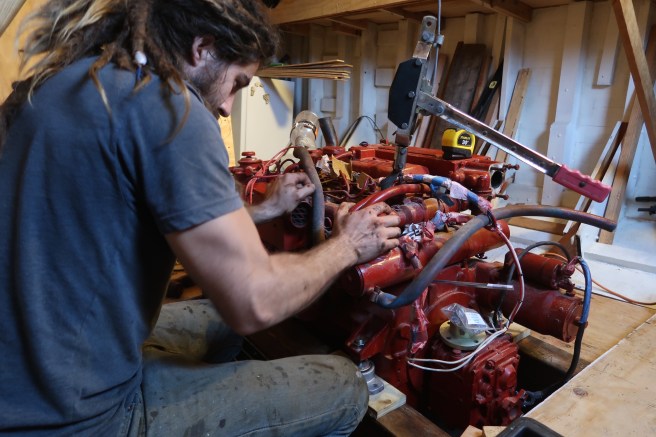
Now that we’ve decided where the engine is going to be it’s time to permanently secure the Westerbeastie. Resting on 4×6 engine beds wasn’t enough for Garrett…maintaining his “if it’s worth building, it’s worth overbuilding” mentality. There will also be angle iron runners. “What if we get overtaken by huge seas and Rediviva rolls…the engine has to remain on its blocks!” How can I argue with this guy???


We’ve also ordered new engine mounts (picture above on far right) so we’ll have the old ones for back up. Garrett’s also ordered some 3/4 inch rubber sheet that will be a spacer between the mounts and the beds.


The beds are fixed into the floors with foot long hot dipped galvanized nails in three places.


Lubed up with Garrett’s Boat Soup (mainly pine tar) the nails are hammered in.


Then the clean up crew.


The engine mounts aren’t in yet and nor are the driveline parts to complete the engine installation so we’ll have to move the engine one or two more times after this (but we’re getting good at moving it back and forth.)


The beds are secure and now onto the angle iron runners. Garrett’s marking the spots where the lags are going to go so we can take the runners over to Tyler’s neck of the woods and use his drill press to make the holes.


Some how this worked out perfectly: the aft floor is taller than the other forward two the engine beds lay on and Garrett wanted some sort of bracket to tie the runner into the third floor AND the over hang happened to be the right size!


We drove over to Tyler’s spot in the yard and using the drill press made the holes that will tie the beds into the floors a little more.


Then we did the same thing with the overhang for the brackets.
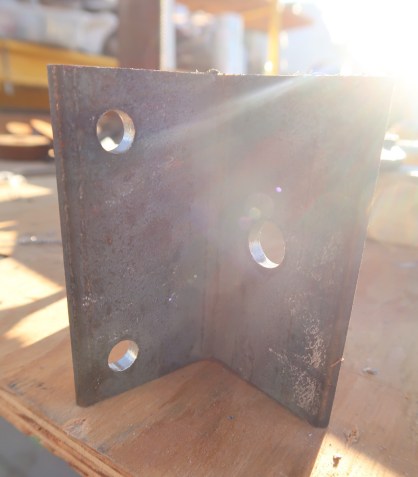
All that’s left before fully installing the runners is to paint the steel. Tyler has some two-part rockstar paint that’s perfect for this. I believe the brand is Devoe, it’s an epoxy coating. We went in on a gallon together because we don’t need a lot and the stuff isn’t cheap. We also used this for our rudder fittings months ago.


Garrett’s been on the phone, on the internet just researching and filling his brain with as much information as he can about u-joints and the various parts that go into the assembly. We’ve ultimately decided to go with a driveline company that specializes in this kind of thing. Mostly cars; however this might be in our favor as we will never have 400 hp or be running an engine at 9,000 rpms so anything they create will most certainly work for our little 52 horse motor where 2500 rpms will be pushing her. The assembly as a whole will include yolks, thrust bearings, a shaft, spiders, and a coupling. I too, have been looking at diagrams and am starting to understand what it is we are doing. I’m looking forward to when we have all the pieces so I can better explain and answer my own questions. This is another experiment of sorts and I think Garrett’s got a very good idea of what he’s doing. More to come!


~Ruthie
Episode 39 is fresh off the boat
We sheath from the waterline down to the chine in a single day. Check it out!
Happy December!
~Ruthie
