and two days later appeared in Napa on Friday morning
This slideshow requires JavaScript.
then the yard brought on the Travel Lift!
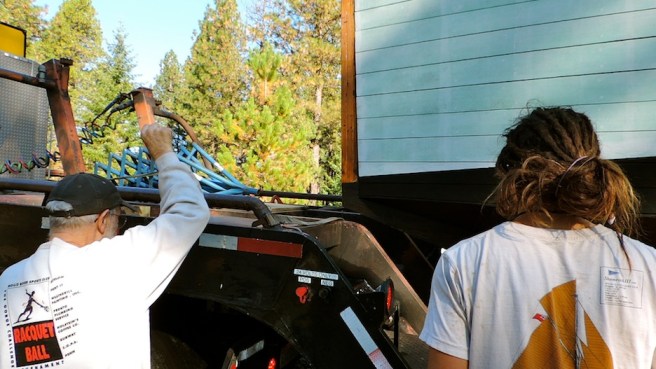
The straps were wrapped around her belly and slowly took her 20,000 pounds off the trailer
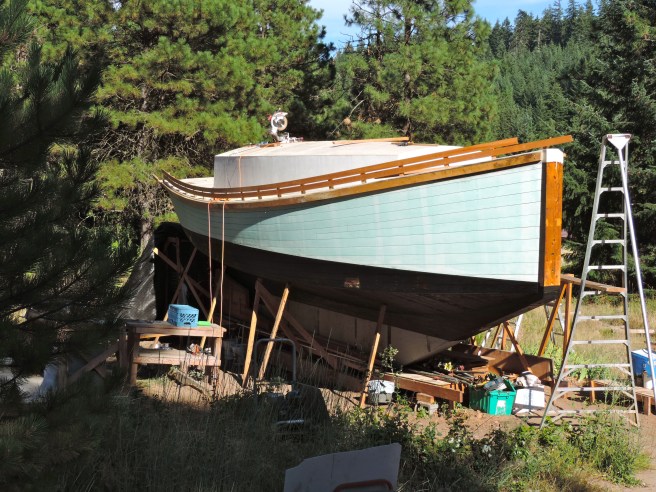
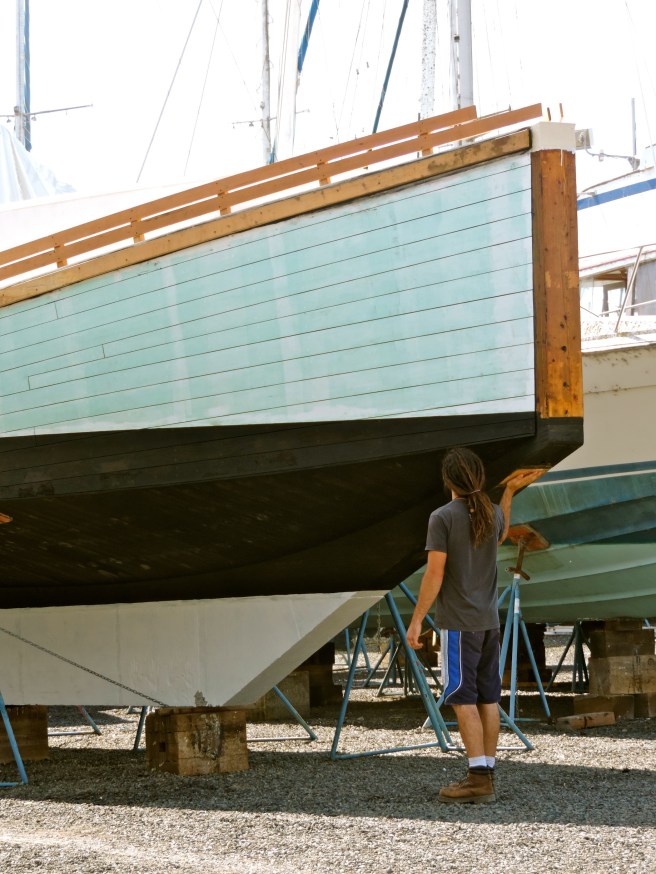
It wasn’t until the boat was in the slings that Garrett could breathe easy. We’d made it out of the woods. The yard had to break for lunch which gave us time to do the same. Burritos and beer. Listening to the chirp of swallows and the clang of rigging. Welcoming sounds. It’s been 3 years since we’ve lived near water. Rediviva stands tall next to her fellow ships.
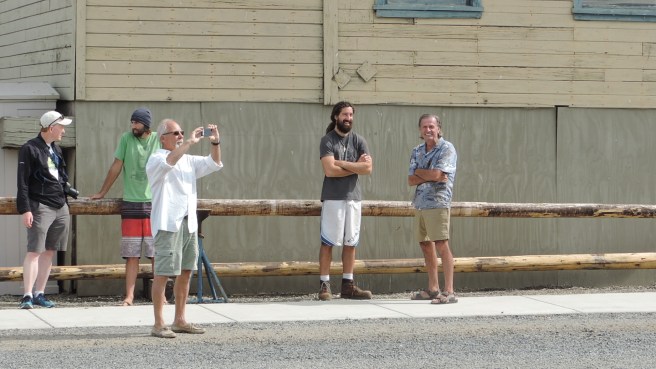
We were joined by some familiar faces and some new ones. My mom broke away from work to greet Rediviva at the gate while my dad caught her at an intersection on the way to the boatyard (video will be up for our Patrons)
Our masts behind the crowd
The engine started and carried her to her new resting place. Awaiting a spot in the “Working” yard. We’re guessing we’ll sit in the storage yard for about a month. Until then we’ll kill time and take it easy working only on the masts and rudder outside the yard.
and it gets even better! They were able to squeeze us in right next to our buddy Geoff’s Cape George which he’s stored here while he’s working up in Alaska. We hope to see him next month
The calm and quite started to seep in as the stands were secured, the straps rolled up and the travel lift backed away. 3rd in on the left she can relax knowing she’ll be safe through the season.
That-a-girl
Garrett’s brother, Reid, stuck around for the whole day and helped us crack our first few beers on deck under the palm tree landscape.
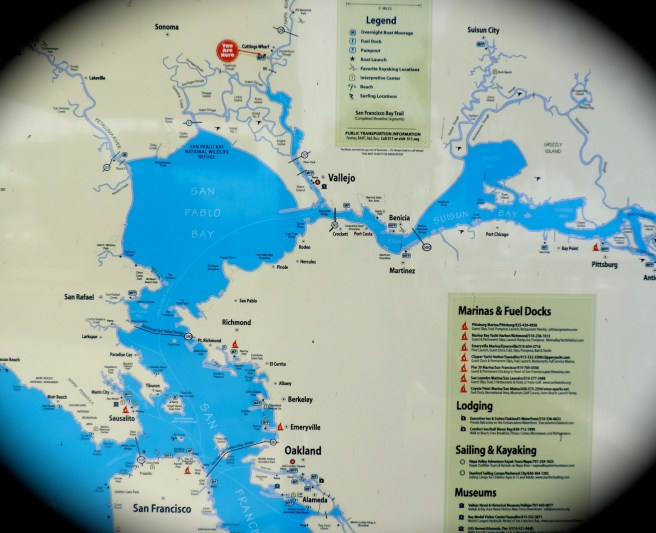
For those of you who’d like to know where exactly we are:
If you were to get to us from the water you’d cross under the Golden Gate round Angle Island and head north into San Pablo Bay. Turning towards Vallejo you enter the Napa River. A couple hours, after you travel through a draw bridge and under the highway 37 bridge, you’ll arrive at the Napa Marina located at the far south end of Napa Valley.
This morning’s view from our window. A little passed a week ago we were delayed transporting the boat for almost 50,000 acres were ablaze in the hills of Oregon, closing the interstate highway. Last night 10 independent fires began burning all around us. Napa Valley, where we moved the boat for safe keeping, had one of the biggest next to the other monster raging in Santa Rosa a mere 40 miles away. Today the hills smolder across the valley from my parents home.
Tonight we’re on edge knowing 20,000 have already been evacuated and seeing more devastation encroaching 5 miles away.
I’ll try to keep you informed if anything changes for our situation. Please keep your thoughts positive for those that aren’t so lucky this evening.
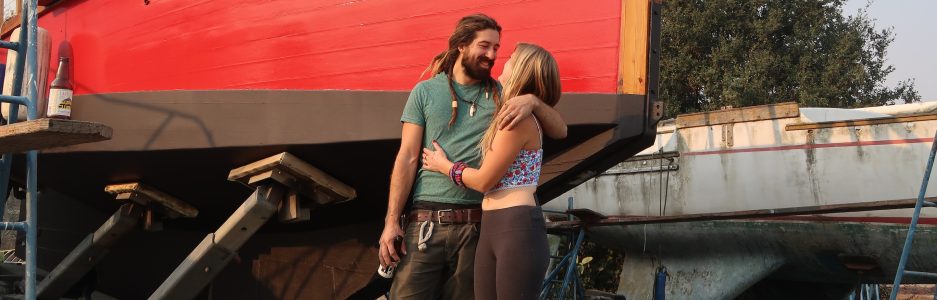
Isn’t life a trip; how one morning you can wake up in one place and the next be almost 700 miles south. How that first morning you were in a spot that seemed inescapable, like you’d never get out of there, then 24 hours later you’ve transported someplace familiar yet fresh. Wednesday awoke with firs and pines and Thursday, practically the exact opposite, gave rise to hay fields and palm trees.
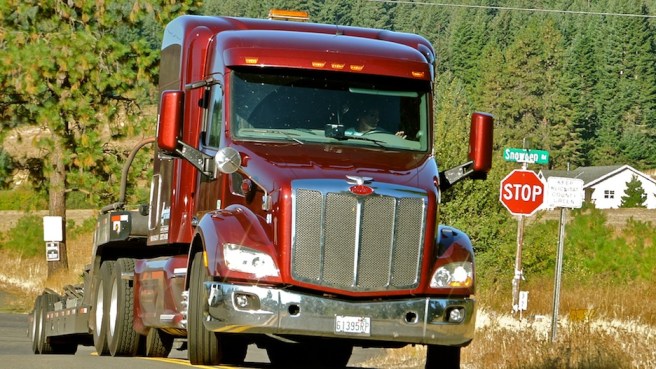
Snowden/Acme Rd.
Napa Valley Boatyard
6 a.m. “Beep… Beep… Beep… Click.” The sound of shuffling feet towards the bathroom and a hand hunting for her glasses on the nightstand fill the darkness. The last time she’ll touch that nightstand, the last time he’ll shuffle his feet on that floor.
Moving day has begun.
The sun meets us at the property. Slowly heating the overnight dew on the ground, in the trees, and off the boat. Like the steam rising from my coffee cup. Weeks of packing, years of building, countless hours of waiting all lead to this moment. The sound of a powerful engine chugging up Snowden road.
Associated Boat Transport
A smile fills Garrett’s face. It’s here.
David, with Associated Boat Transport, hands Garrett a radio and armed with a plan he backs up the colossal truck down towards Rediviva. Be it nerves or coffee our hands shake with excitement… no eagerness… no suspense. I need a better word! One to sum up everything; a word to describe the indescribable. Passion:
pas·sion
ˈpaSHən/
noun
1. strong and barely controllable emotion.
2. the suffering and death of Jesus.
I’ll take it, something big is happening and neither of us can wrap our mortal heads around it.
Jim and Garrett “spotting” for David at the wheel
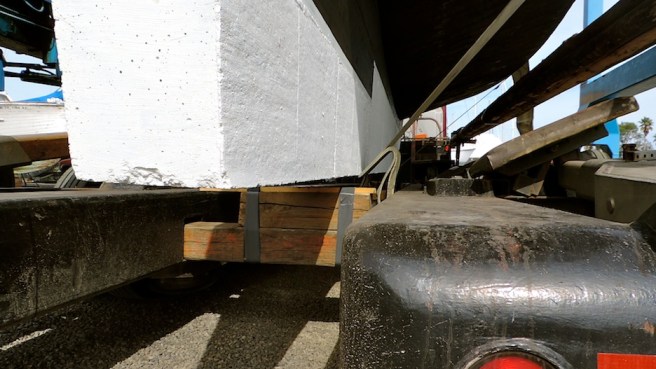
So, how does the hydraulic truck work?:
First off it’s really cool! Second, it’s really the trailer its self that’s hydraulic. With air-bag suspension and hydraulic arms that release the weight off our stands and hold her in place during transport. Having built the boat on a “slight” hill we ended up using the arms quite a bit. This process really made Garrett’s dreads stand on end.
Garrett and David discussing the best “game plan”
This is one of the three hydraulic arms on either side of the trailer
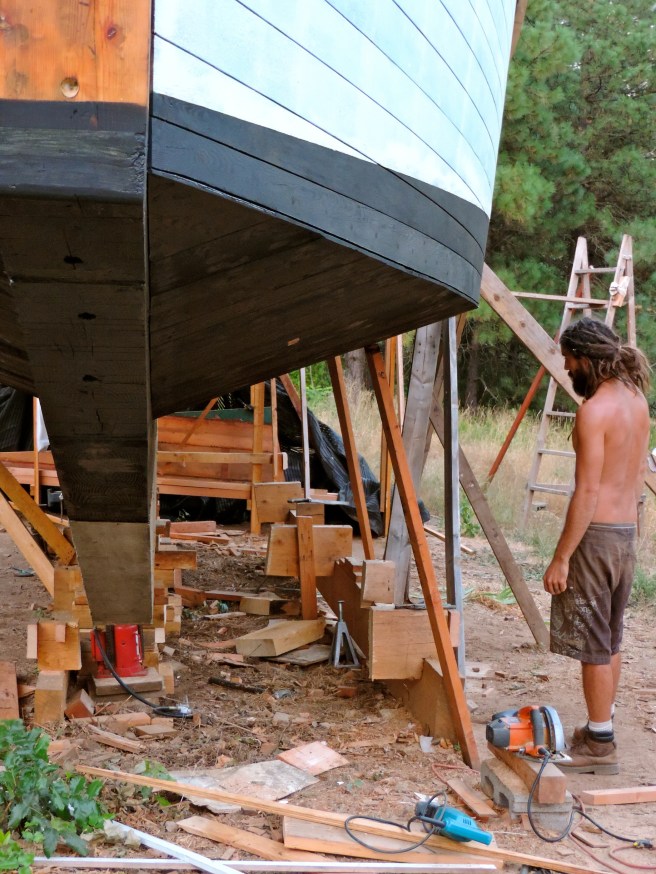
The trailer can lower practically down to the dirt. This was really useful because as you can see the aft end of the keel is way higher than the bow (so that the boat was level while building) but she couldn’t very well sit on the trailer with her tail sticking up like that now could she….
On the sides of the trailer, if you can see the square holes, long beams are slid in which the boat will rest on during transport. Preferably no other blocking should rest between these beams and the boat, to keep her height low while on the road. We just had to lower her butt down a good 3 feet to make that happen.
So the tedious task of lowering her inch by inch (block by block) down to where she lays keel flat on the trailer began. This is where the arms were a key player. David slowly moved each arm independently while Garrett ran around the boat removing the spacing blocks one at a time. Being careful not to remove too many too quickly just in case the boat slipped (a fail-safe.)
One last block to remove
!Success!
(Before)(After)
All that was left was to get the masts next to the boat on the trailer and strap everything down tight. By this time we were approaching evening and the scales were closed. So we couldn’t get a final weight on the boat (which was required for legality reasons) so we kissed Rediviva goodnight and told her we’d see her when she arrives in the Golden State.
This slideshow requires JavaScript.
I don’t know what was harder loading the boat or saying goodbye to friends
Thank you Mark and Sherry who stayed ALL day. Down to the bitter end and helped us lift the masts onto the trailer.
We packed Swabie up and leaving only our tracks in the dirt we said a final farewell to the Gorge. Paid our last $1 to cross the bridge, merged onto the interstate highway, accelerated to 60, and traveled south.
(Seeing as a full week has passed since our truck date and I had yet to write up much about it I took some advice to split up the transport story in order to get it to y’all sooner 🙂
I’ll be posting photos as soon as the boat makes it down the Snowden Hill!!!! I’ll be putting everything up on Instagram (@saltandtar) and on our Patreon page so it’ll be easy from the road. Got to jet now over to the property “first thing in the morning” is our scheduled pick up time 🙂
The good news is that it wasn’t us that delayed our transport. We are so ready. The weather on the other hand has some other ideas. Along the Columbia and all over Oregon fires have been raging closing the interstate highway. On the other side of the US hurricanes pelt the coast. Our driver has been held up on the east coast with a delivery and has needed to push us back a week. So new plan! Wednesday the 27th Rediviva will be loaded up and take to the road. We had some friends and neighbors pass through this weekend to say farewell. The bow is packed full of our belongings and tools while we sit pretty for another week. Not the worst thing in the world. We have much to be thankful for. The smoke being our biggest enemy and the main fire still 20 miles away across the river, we are safe.
Smoke and ash so heavy you can look directly at the sun!
For 2 years we’ve been a 5 hour drive from Port Townsend and the Wooden Boat Festival. This time we didn’t miss it! We only caught the last day but it was worth waking up at 2:45 am to be there when they opened the gates for the day. Not too stoked about the speeding ticket I got ($125!) even looking at wooden boats is expensive. I snapped photos left and right to log the numerous ideas that flowed from vessel to vessel.
Ideas for wooden cleats, chocks, and blocks
Ideas for ventilation
Ideas for crew bunks
Simple ideas for the goose neck
and storing fenders (notice the tires underneath bulwarks)
Ideas for various metal works (in our case iron not bronze)
Ideas for hideaway ports, rolling folding tables, and doors on slides. The last picture is a split head/wet locker right by the companion way and the double pained door in on slides. One side can be open or both can be closed off. I’ve been telling Garrett this idea for our pullman berth but with more of a barn style with external slides. Cool to see similar ideas in action.
From a beautiful Hugh Angelman Sea Spirit ideas for galley layout and how a full width mirror in the head truely makes it feel ginormous. Garrett’s always been a fan of green tile for counter tops. I love the knife storage in the galley.
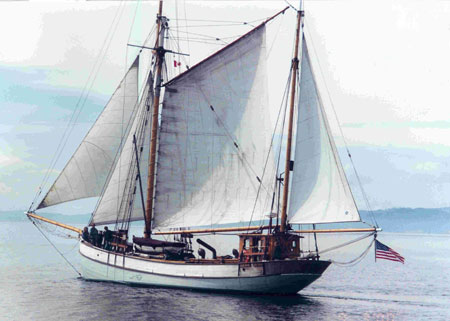
Sea Dream was one Garrett drooled overLady Hawk was our FAVORITE. 1934 Dutch built ketch. Restored by the owner in 1977 from a North Sea Fishing vessel with a hold to a cruising liveaboard. Using any material he could find. Old tires, telephone poles and cables, scrap iron and boat parts.
And the one that got away… We were running out of time to see all 300 boats and Silva Bans escaped us. Her crazy transom is an absolute dream and with her retractable bow sprit we really wanted to take a look at this beauty. She’s a one off design built in ’86 and matches Rediviva’s length at 35 feet. We would have loved to see how her interior was completed.
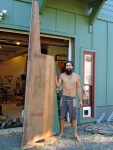
Garrett coveted the work shop on a 81 ft Dutch fishing vessel
While I craved the galley space and garden on a 50 ft troller
(did you see that spice rack!)
We met so many wonderful people and quite a few boatbuilders. We left Port Townsend with pretty full pockets. Ideas itching to get used. Exactly a week from now Rediviva will be on the road thus marking the end of one chapter and the opening to the next. We got to hear Lin Pardey speak at the festival and she quoted some good advice from Larry. “You don’t build a boat. You build a keelson. Complete a keelson and celebrate. Then you build a stem. Complete it, stand back, and celebrate. You build stages and you celebrate every step or you’ll be crippled by the enormity of the project.” Advice I don’t think we would’ve heard quite the same a year ago hell even months ago. We are listening now and are celebrating where and how Rediviva stands today.
The day began with a simple goal, a simple task, building the second slide stand on the port side. Garrett didn’t stop there. Before I knew what was happening he was sawing the cradle floor away!
This is why I settle for ideas not plans because I never know what I’m going to get with this guy.
The slide stands on either side are to keep Rediviva from tipping over one way or another while we, using 4 jacks, lifted her up from the cradle. She has sat on this cradle since she was just a keelson, one timber compiled of 8 layers of 2X10’s.
Tools needed:
1 sledge hammer
1 crowbar
4 aggressive hands
Here comes the fun part. It’s time. We really got our money’s worth with this plywood. We originally drew the lines of the boat on it in the lofting process, built a separate working floor with it, constructed the frames on it, made an entire boat atop it, we even built an outhouse. Ripping it all up, tearing it down, and burning the remains is not mournful but liberating. Cleaning up the property and moving out is beyond exciting, we’re ecstatic!
After most of the floor was removed and the framing on the sides were gone the jacks went to work.
The idea is to lift the boat just enough to get the weight off the cradle and the remaining scraps of ply underneath. As the boat lifted so did the cradle; relieved of its burden. We had to raise the boat about 3/4’s of an inch before we could wiggle the broken bits of plywood. 3/4’s of an inch… big deal… well when you’re lifting a thing that weighs about 10 tons and you’ve spent the last 2.5 years of your life devoted to building that thing while most young 20 somethings are not building a 35ft wooden boat alone in the woods it feels a little bit like a big deal. You hear loud cracks and crunching wood. Wait! Was that the boat!?!? Trying to stay light hearted about the whole ordeal I laughed every time Garrett just about jumped out of his skin at the sound each “POP.” Can you blame him though?
Before we knew it, racing the sun a bit, the moment came to let the SAWZALL into the ring. A tool appropriately named for the task; to saw all that was left. Garrett alternated beams then cubed them up to use for blocking under the keel. In order to get the hydraulic truck in we can’t have any blocking/supports wider than the keel its self.
As the sun set behind the forest line the only thing left to do is tidying up the debris and we’ve got 5 weeks to do that
WE HAVE OUR TRUCK OUT DATE SET AND IT’S TIME TO LAY THE TOOLS DOWN
…FOR A MOMENT ANY WAY. WE ARE SO EXCITED TO BE MOVING! IT FEELS NORMAL FOR US. TRAVELING IS HOME. IT HAS BEEN SO CRAZY HOT THE LAST FEW WEEKS, IN THE 100’S, AND THEN THIS MORNING 66 AND RAIN. OK, SO… JUST LIKE THAT THE WEATHER TRANSITIONS FROM SUMMER TO FALL. WE ARE NOT BUMBED EVEN IN THE SLIGHTEST TO BE SKIPPING OUT ON THE WINTER. BEAUTIFUL WHITE MOUNTAINS ARE GREAT FOR SKIING BUT NOT FOR THESE BOATBUILDERS. NAPA BOATYARD WILL ALLOW US TO KEEP WORKING THROUGH THE REMAINING MONTHS OF 2017 AND WELCOME 2018 WITH A SPLASH. OUR GOAL IS TO LAUCH NEXT SPRING. 3/4 OF THE WAY THERE, 3/4 OF THE WAY TO THE WATER, 3/4 OF THE WAY TO LIFE.
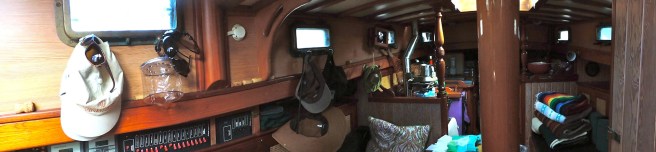
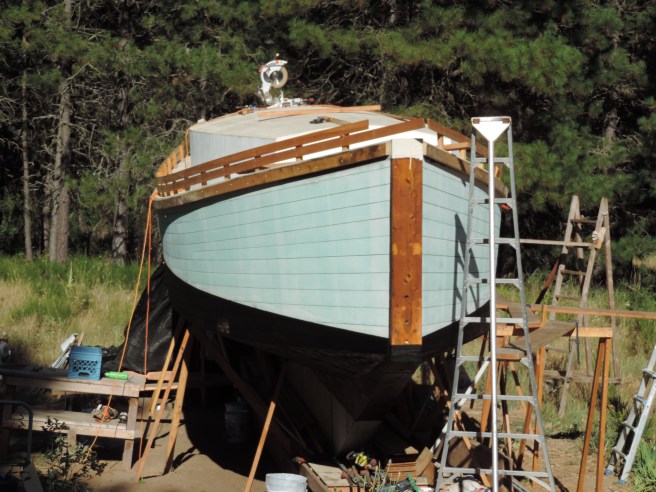
Bulwarks planked, rubrail on, and bottom coated. It seems now that every day we work she really looks more and more like a boat! She is ready to be trucked. Everything else can be done at the boatyard, or after we launch. I (Garrett) have decided that I am no longer going to push myself for the remaining time up here. We have a few loose ends to tie up, but as it is now we are leaving in September! We are going to sloooooooow down, catch our breath, work on getting the property cleaned up, and packing everything. We will work on the boat when we feel like it. We will swim in the river when we feel like it…. The point is I finally see the light at the end of what has been an incredibly challenging undertaking, and I want to gather my strength for the final push. It’s pretty surreal making plans and setting dates with boatyards and trucking companies! It doesn’t feel real… It’s wild to go through everything that needs to be done before we launch in my head over and over, and realize that list is so small! We plan to keep Rediviva simple. No complex electrical system, gravity fed water, and basic rugged hardware. The most complex thing left to do before we launch is finish hooking up the motor. Having done it a few times already on previous boats I am not concerned about it. Everything else is just details, and as long as we keep chipping away she will be complete before we know it!
Wish us luck getting everything buttoned up out here! Very big changes are coming!
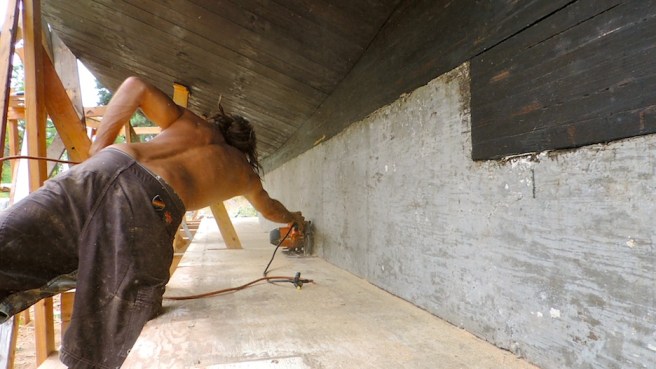
It’s perfect. I love doing more intricate painting where as Garrett is happy to get down with a roller and get it over with. Personally, I can’t stand rolling on paint. The feel of the brush, simple in your hand, is oddly satisfying. Learning how to make a straight, clean line without tape (because I also hate taping) using a shitty chip brush makes me feel complete.
I slowly cut in the waterline while Garrett ran around me like a mad man rolling on primer. Hoffa was away on a job so it was back to the basics and just the two of us. Garrett and I have an odd but harmonious work style. It’s about the only time I shut up. Few words are spoken and we each go about our tasks. Somehow we’ve found our opposite, filling in each others blanks.
^Everyday he looks more and more like a “normal” boatbuilder^
(CRAZY)
Garrett tackled the rudder in, I’m not kidding you, a single day. A breaker has flipped in a very awesome way. Noticing, all of a sudden, the sun is shinning and the the tar in the air smells sweet.
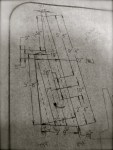
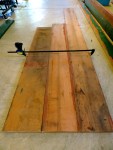
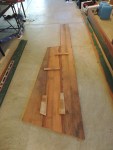
You’ve got the plans. The ruff stock. Shaped. Second layer. BINGO!
Glued together with epoxy and mechanically fastened. Ready for some steel strapping, pintles and gudgeons but we’ll have to find a welder first.


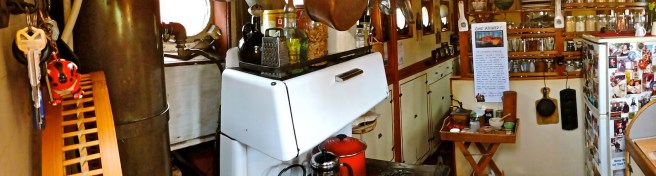 (did you see that spice rack!)